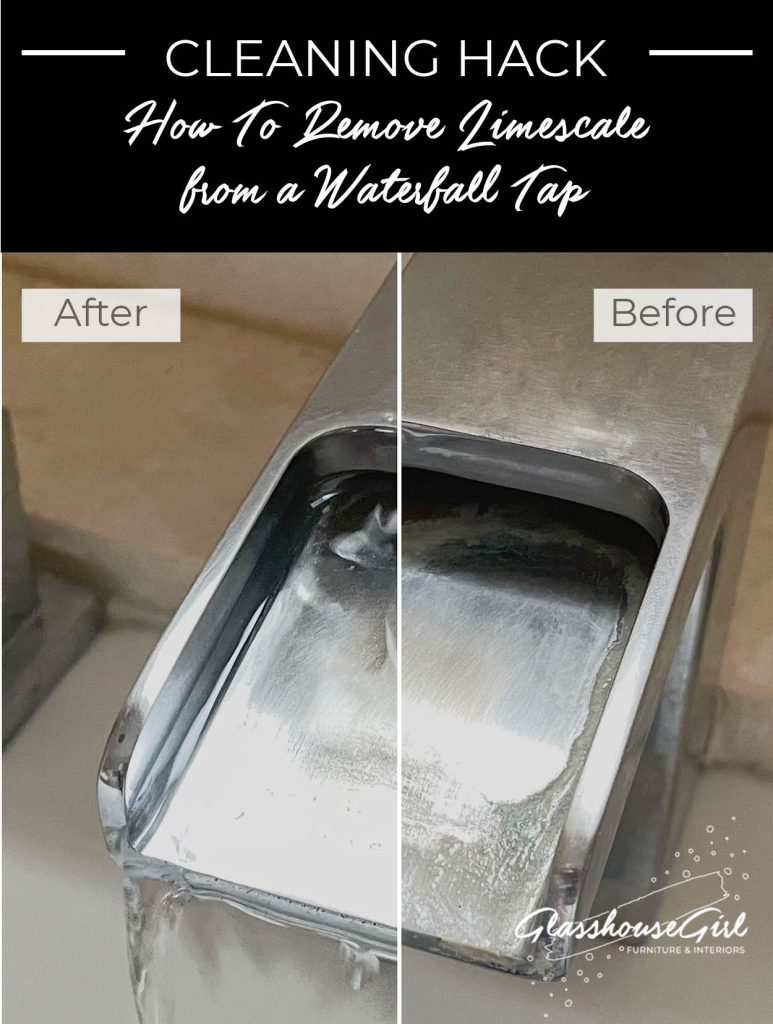
I’ve been tearing my hair out trying work out how to remove limescale from our waterfall taps. We’ve had waterfall taps in our bathroom for almost fifteen years but I think they’ve only ever been truly clean for about 15 days! We live in London, which is a notoriously hard water area, and limescale builds up on all our sinks and sanitaryware in a matter of weeks. If you’d asked me: “Would you recommend having a waterfall tap?”, my answer up until now would have been a resounding: “Hell, no!”
Now, if I’d religiously cleaned it with limescale remover from day one, then I’m sure it would all have been sunshine and rainbows but, frankly, with three kids and my own business, who the hell has time for that kind of thing, right? In my experience, once you’ve let the limescale get crusty, then you were pretty much doomed to have a white ring inside the waterfall part of the tap forever more… that is until now! I’m going to show you how to remove limescale from your waterfall tap without any fancy cleaners!
Limescale remover, vinegar and lemon juice don’t work (and can make it worse!)
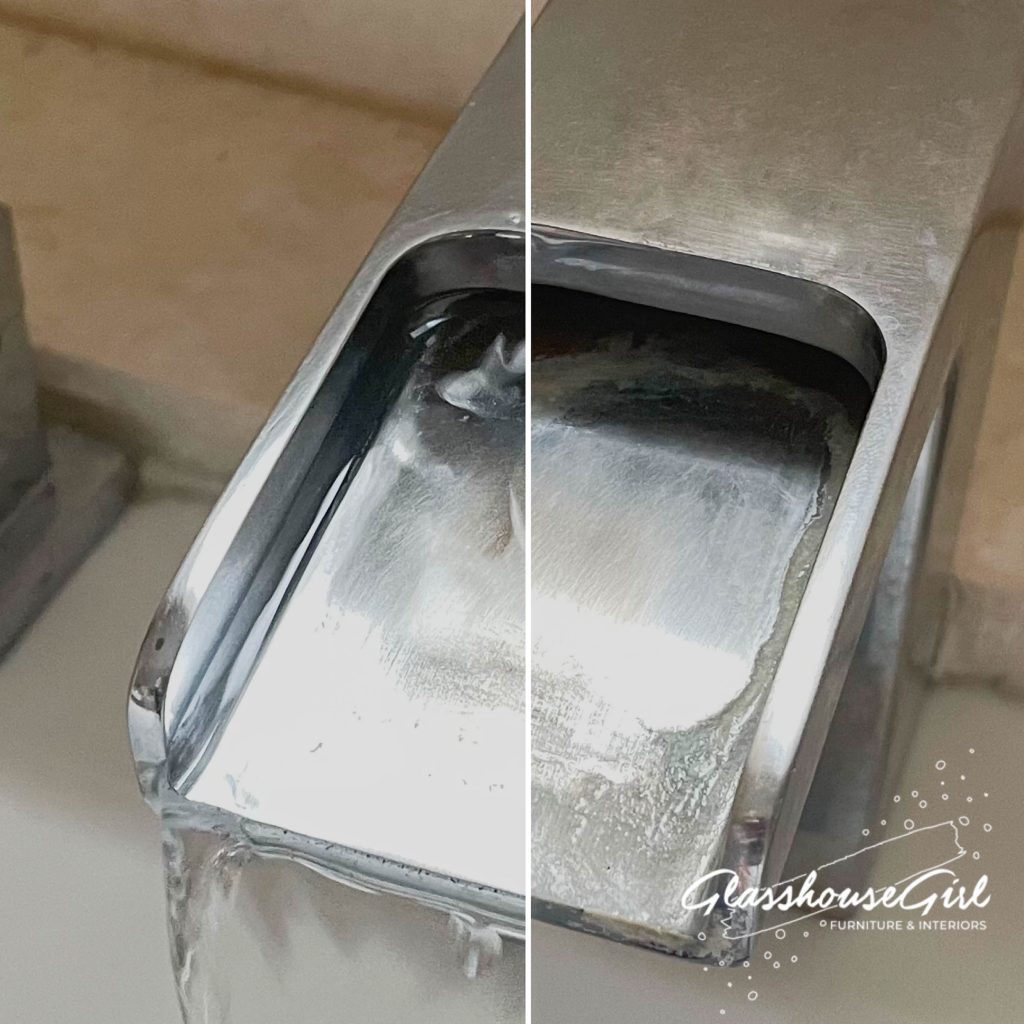
This was one of my taps and it wasn’t even the bad one. There was a crusty ring of limescale that just wouldn’t come off and I’d tried leaving tissues soaked in Viakal (limescale remover), vinegar or lemon juice on it for hours. It made little difference apart from the acids starting to strip the chrome off. You can see in the middle area where previous scrubbing with abrasive sponges and cleaning products has started to degrade the chrome. 🙁 The waterfall design means that when you turn off the tap, a small amount of water is left standing in the spout. This then evaporates leaving mineral deposits behind that build up over time and form a crust. It’s the same stuff that stalagmites and stalactites are made out of. Can you imagine a mini mountain being built on your tap? That’s kind of what’s happening!

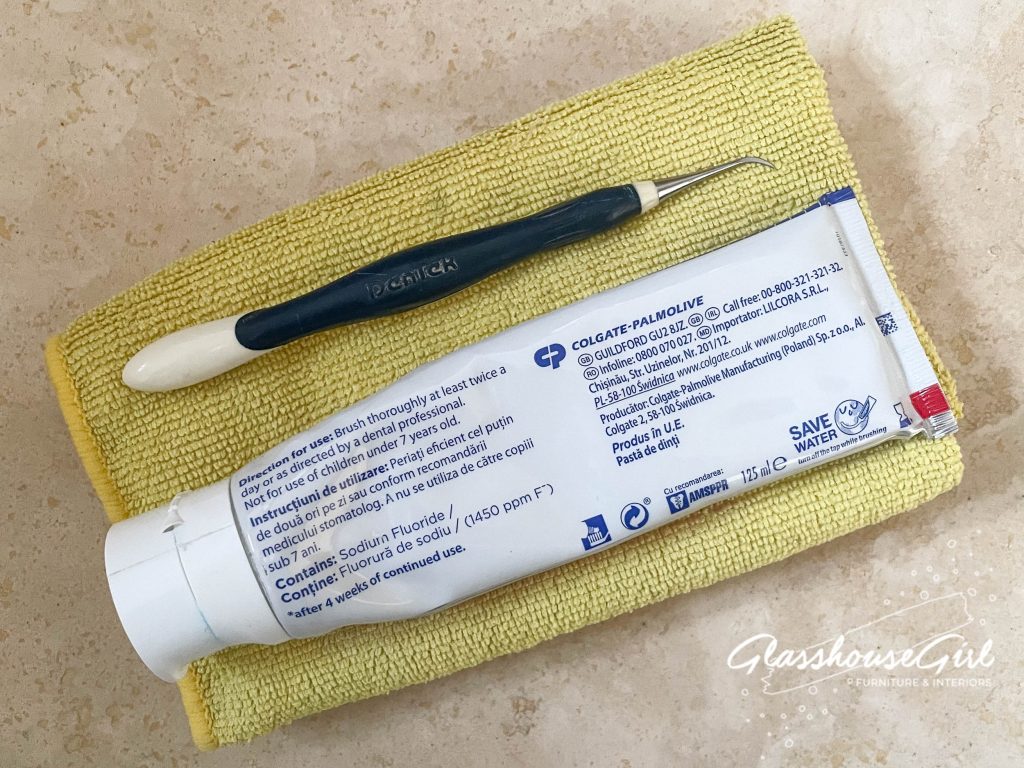
What you will need to remove the limescale
So, here are your tools (weapons) of choice… A microfibre cloth, toothpaste and, wait for it… a dental scaler! Toothpaste and dental scalers are specifically designed to remove tartar build up (very similar to limescale) without damaging your enamel, which struck me as being very similar to chrome. And so, a hack was born.
The process
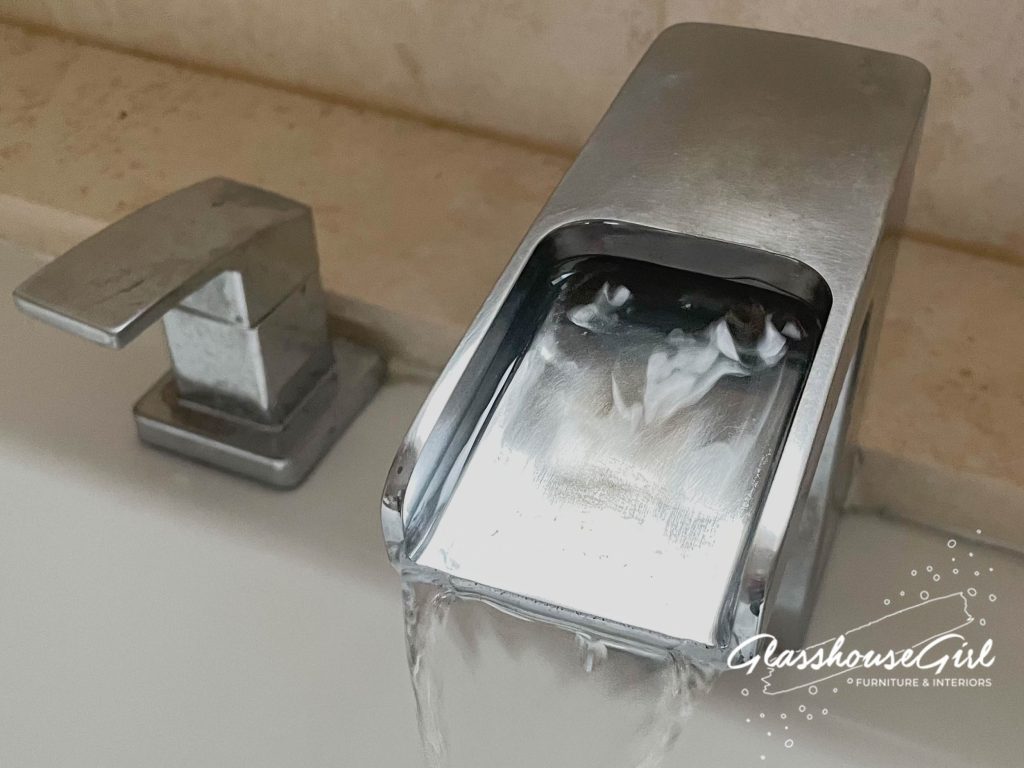
- Squirt on a generous amount of toothpaste and swirl it around so that it covers the whole waterfall area. Rub some over the end of the tap and even underneath, where you’ll find a sneaky additional build up of limescale. Then leave it for 30 minutes.

- Take your dental scaler, with the head on its side, start gently rubbing at the limescale as if you are scaling your teeth. You want to use the side of the blade and not the tip. Don’t press too hard, just start gently working away at the build up starting from the back (you don’t want to damage the tap after all) and bringing the toothpaste forward as you do so. You’ll suddenly feel and hear some of the limescale start to chip off.

- If the limescale stops coming off easily, simply spread the toothpaste back over the area, leave for another 15 minutes and then repeat step 2. The toothpaste is loosening the limescale, which allows the scraper to remove it.
- When all the limescale is gone, and before you turn the tap back on, rub the tap with your glove covered hand. You’ll see the limescale start to mix with the toothpaste and may even turn it yellow like mine did. The toothpaste is a gentle abrasive and it will remove the last residual layer of limescale which will slow down its return.
- Turn on the tap and, with the microfibre cloth, clean off all the toothpaste and buff your tap to a beautiful new looking shine!
This technique works equally well on tap bases, round the tap head and in other hard to reach area of limescale.
I really hope you enjoyed this cleaning hack on how to remove limescale from a waterfall tap, so subscribe to my newsletter or follow Glasshouse Girl on Pinterest for gorgeous upcycled furniture, home cleaning hacks, DIY upcycling tutorials, easy but tasty recipes and more!
Disclaimer
Glasshouse Girl provides hints and tips based on our own experience. If you choose to try these hints and tips for yourself, you are doing so entirely at your own risk. Always conduct a small test patch to ensure the process doesn’t cause damage. If in doubt, engage the on-site services of a professional tradesperson.

Leave a Reply
You must be logged in to post a comment.